Appearance
Managing Data with Core Data: Setting Up
Last Updated: Dec 15, 2024
INFO
Resources:
- Apple's Core Data project
- HWS from Paul Hudson: https://www.hackingwithswift.com/books/ios-swiftui/how-to-combine-core-data-and-swiftui
We have seen what Core Data is, why choosing it, and its fundamentals—now it's time to get it up and running in your app!
In this article, we are going to cover different parts:
- Adding Core Data to your project.
- Setting up the Core Data stack.
Adding Core Data to Your Project
Please open Xcode and select Create New Project…. Then, choose App in the iOS category.
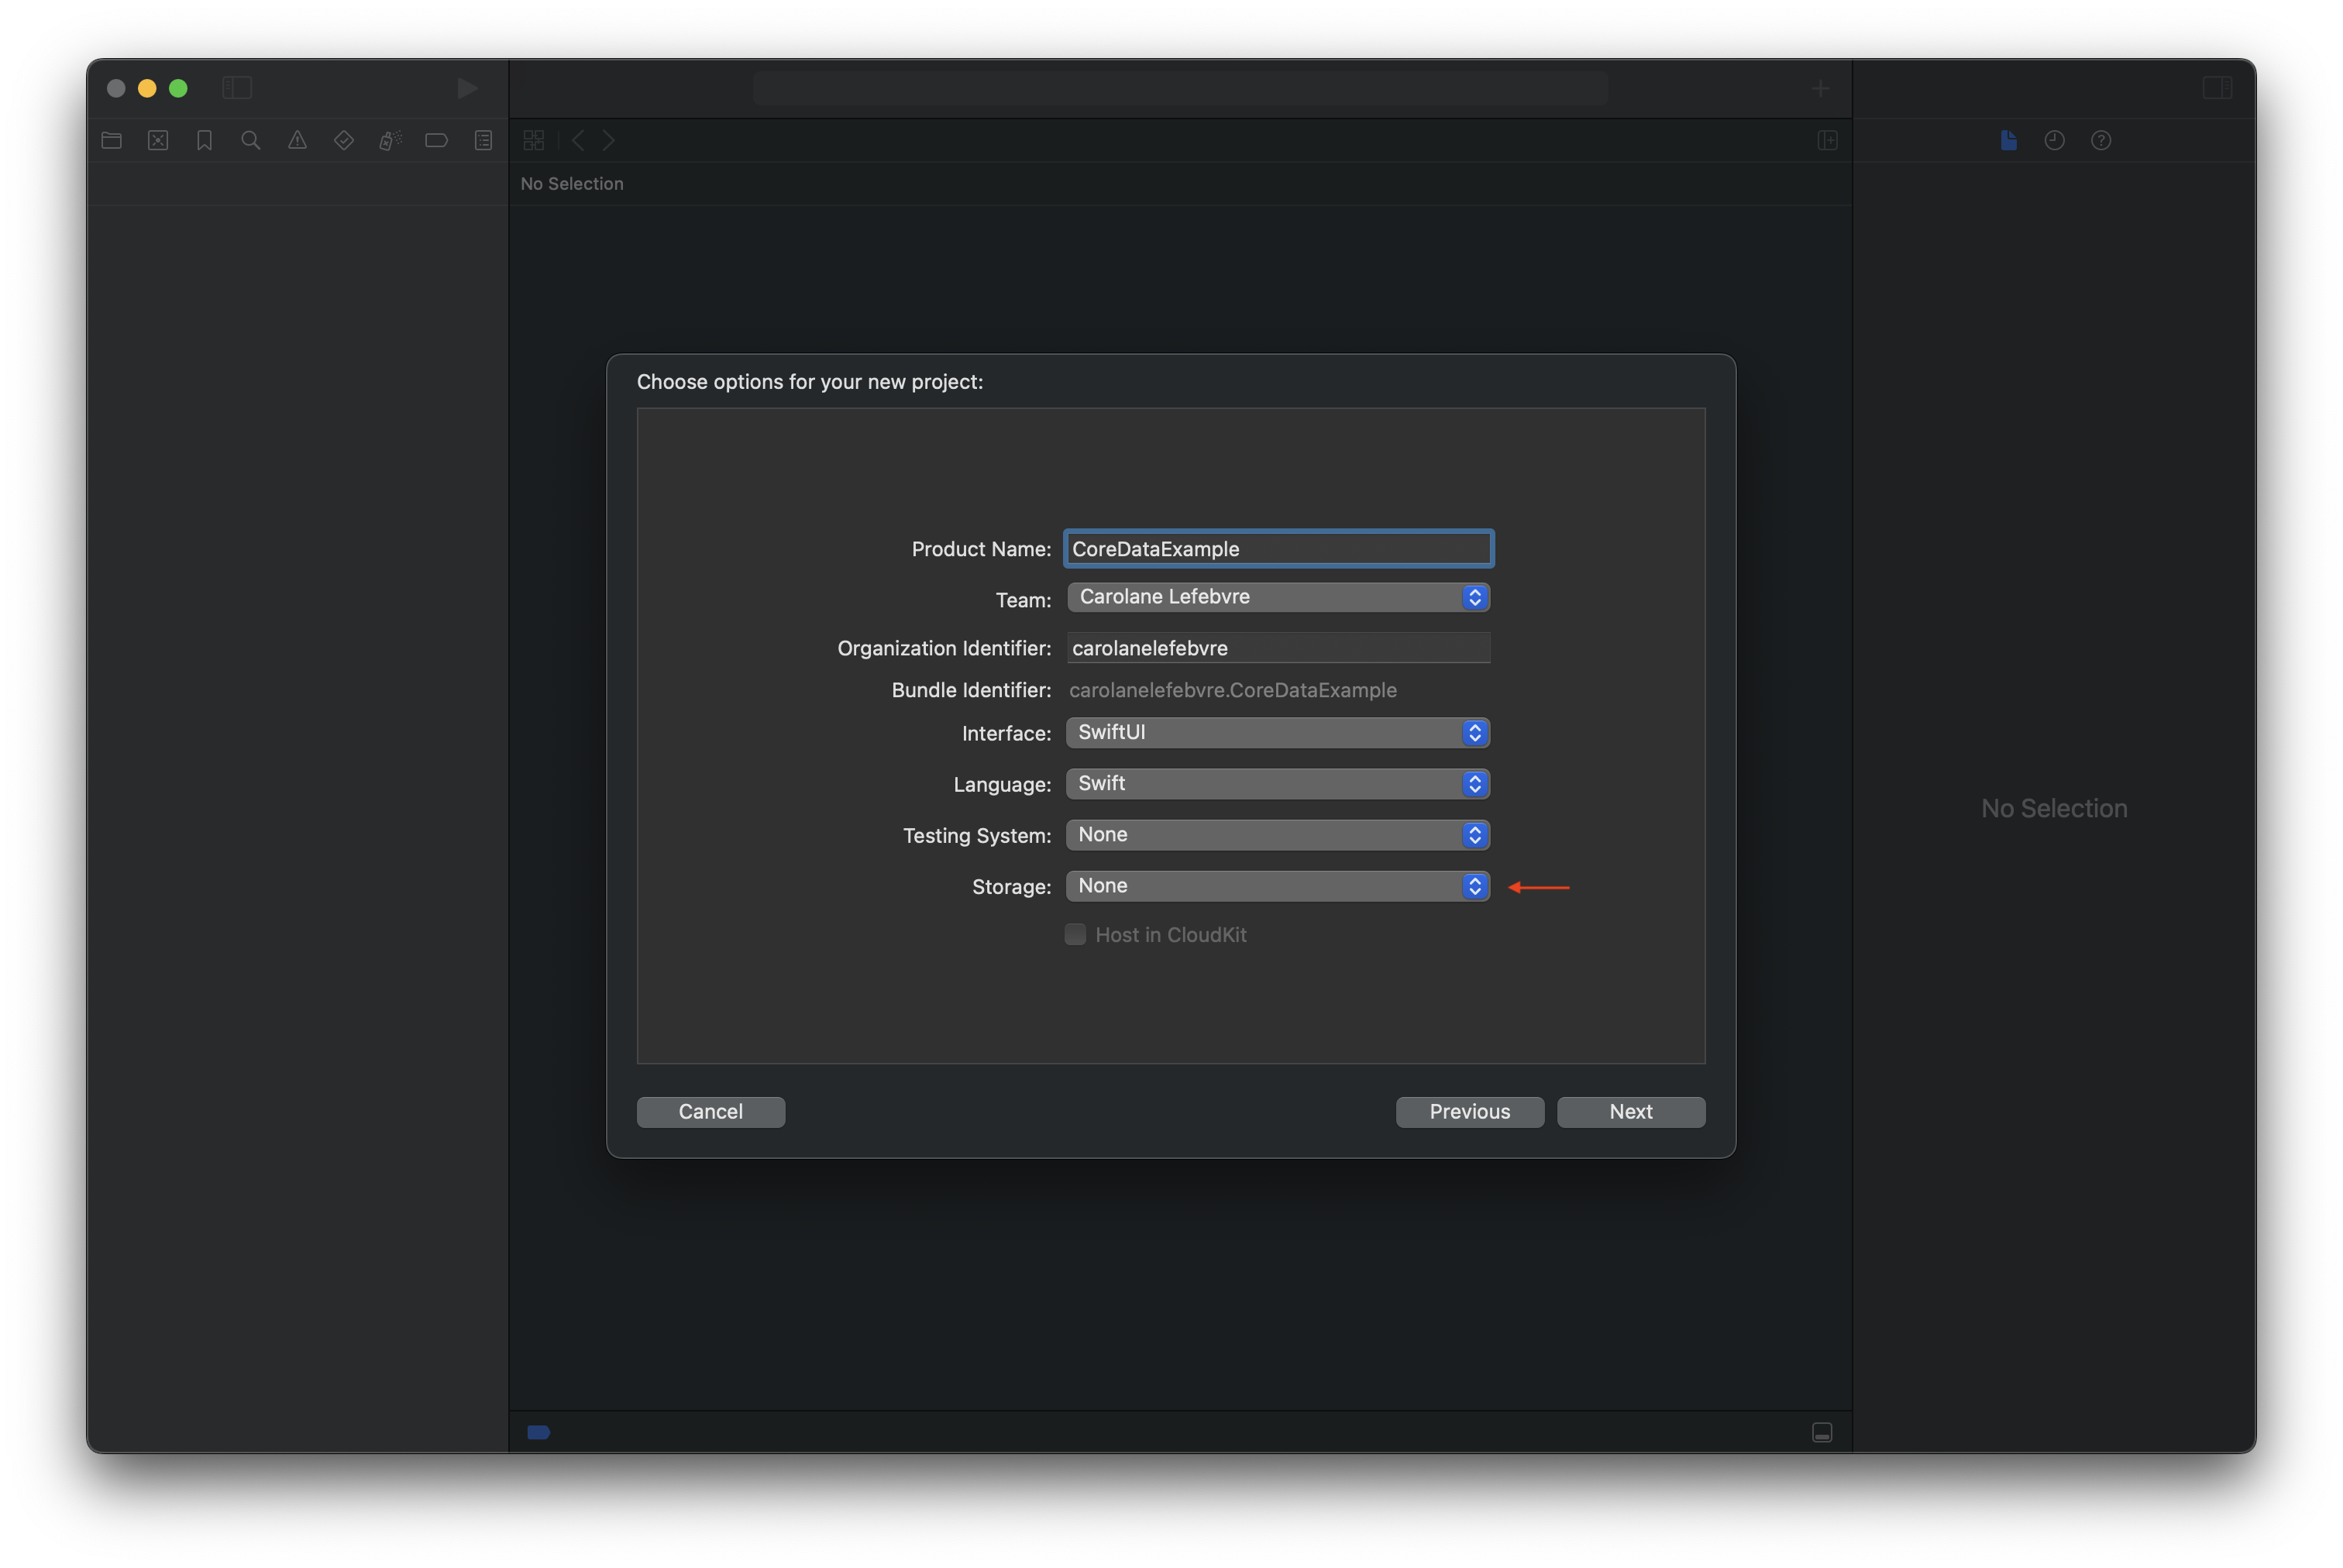
As you can see here, we're skipping the Storage type, because I want to show you how to set up Core Data manually. This helps you understand the Core Data stack better and gives you more control. So please, choose your Product Name and a Team, leave SwiftUI and Swift, and choose None for Testing System and Storage.
Great! Now you can see in your project different files:
CoreDataExampleAppserves as the entry point of the app, defining the main application structure and launching the initial SwiftUI view.ContentViewwhich is the primary view when creating an iOS application using SwiftUI.
Now, let’s create our first Core Data file.
Create a new file and scroll down to find Data Model in the Core Data category:
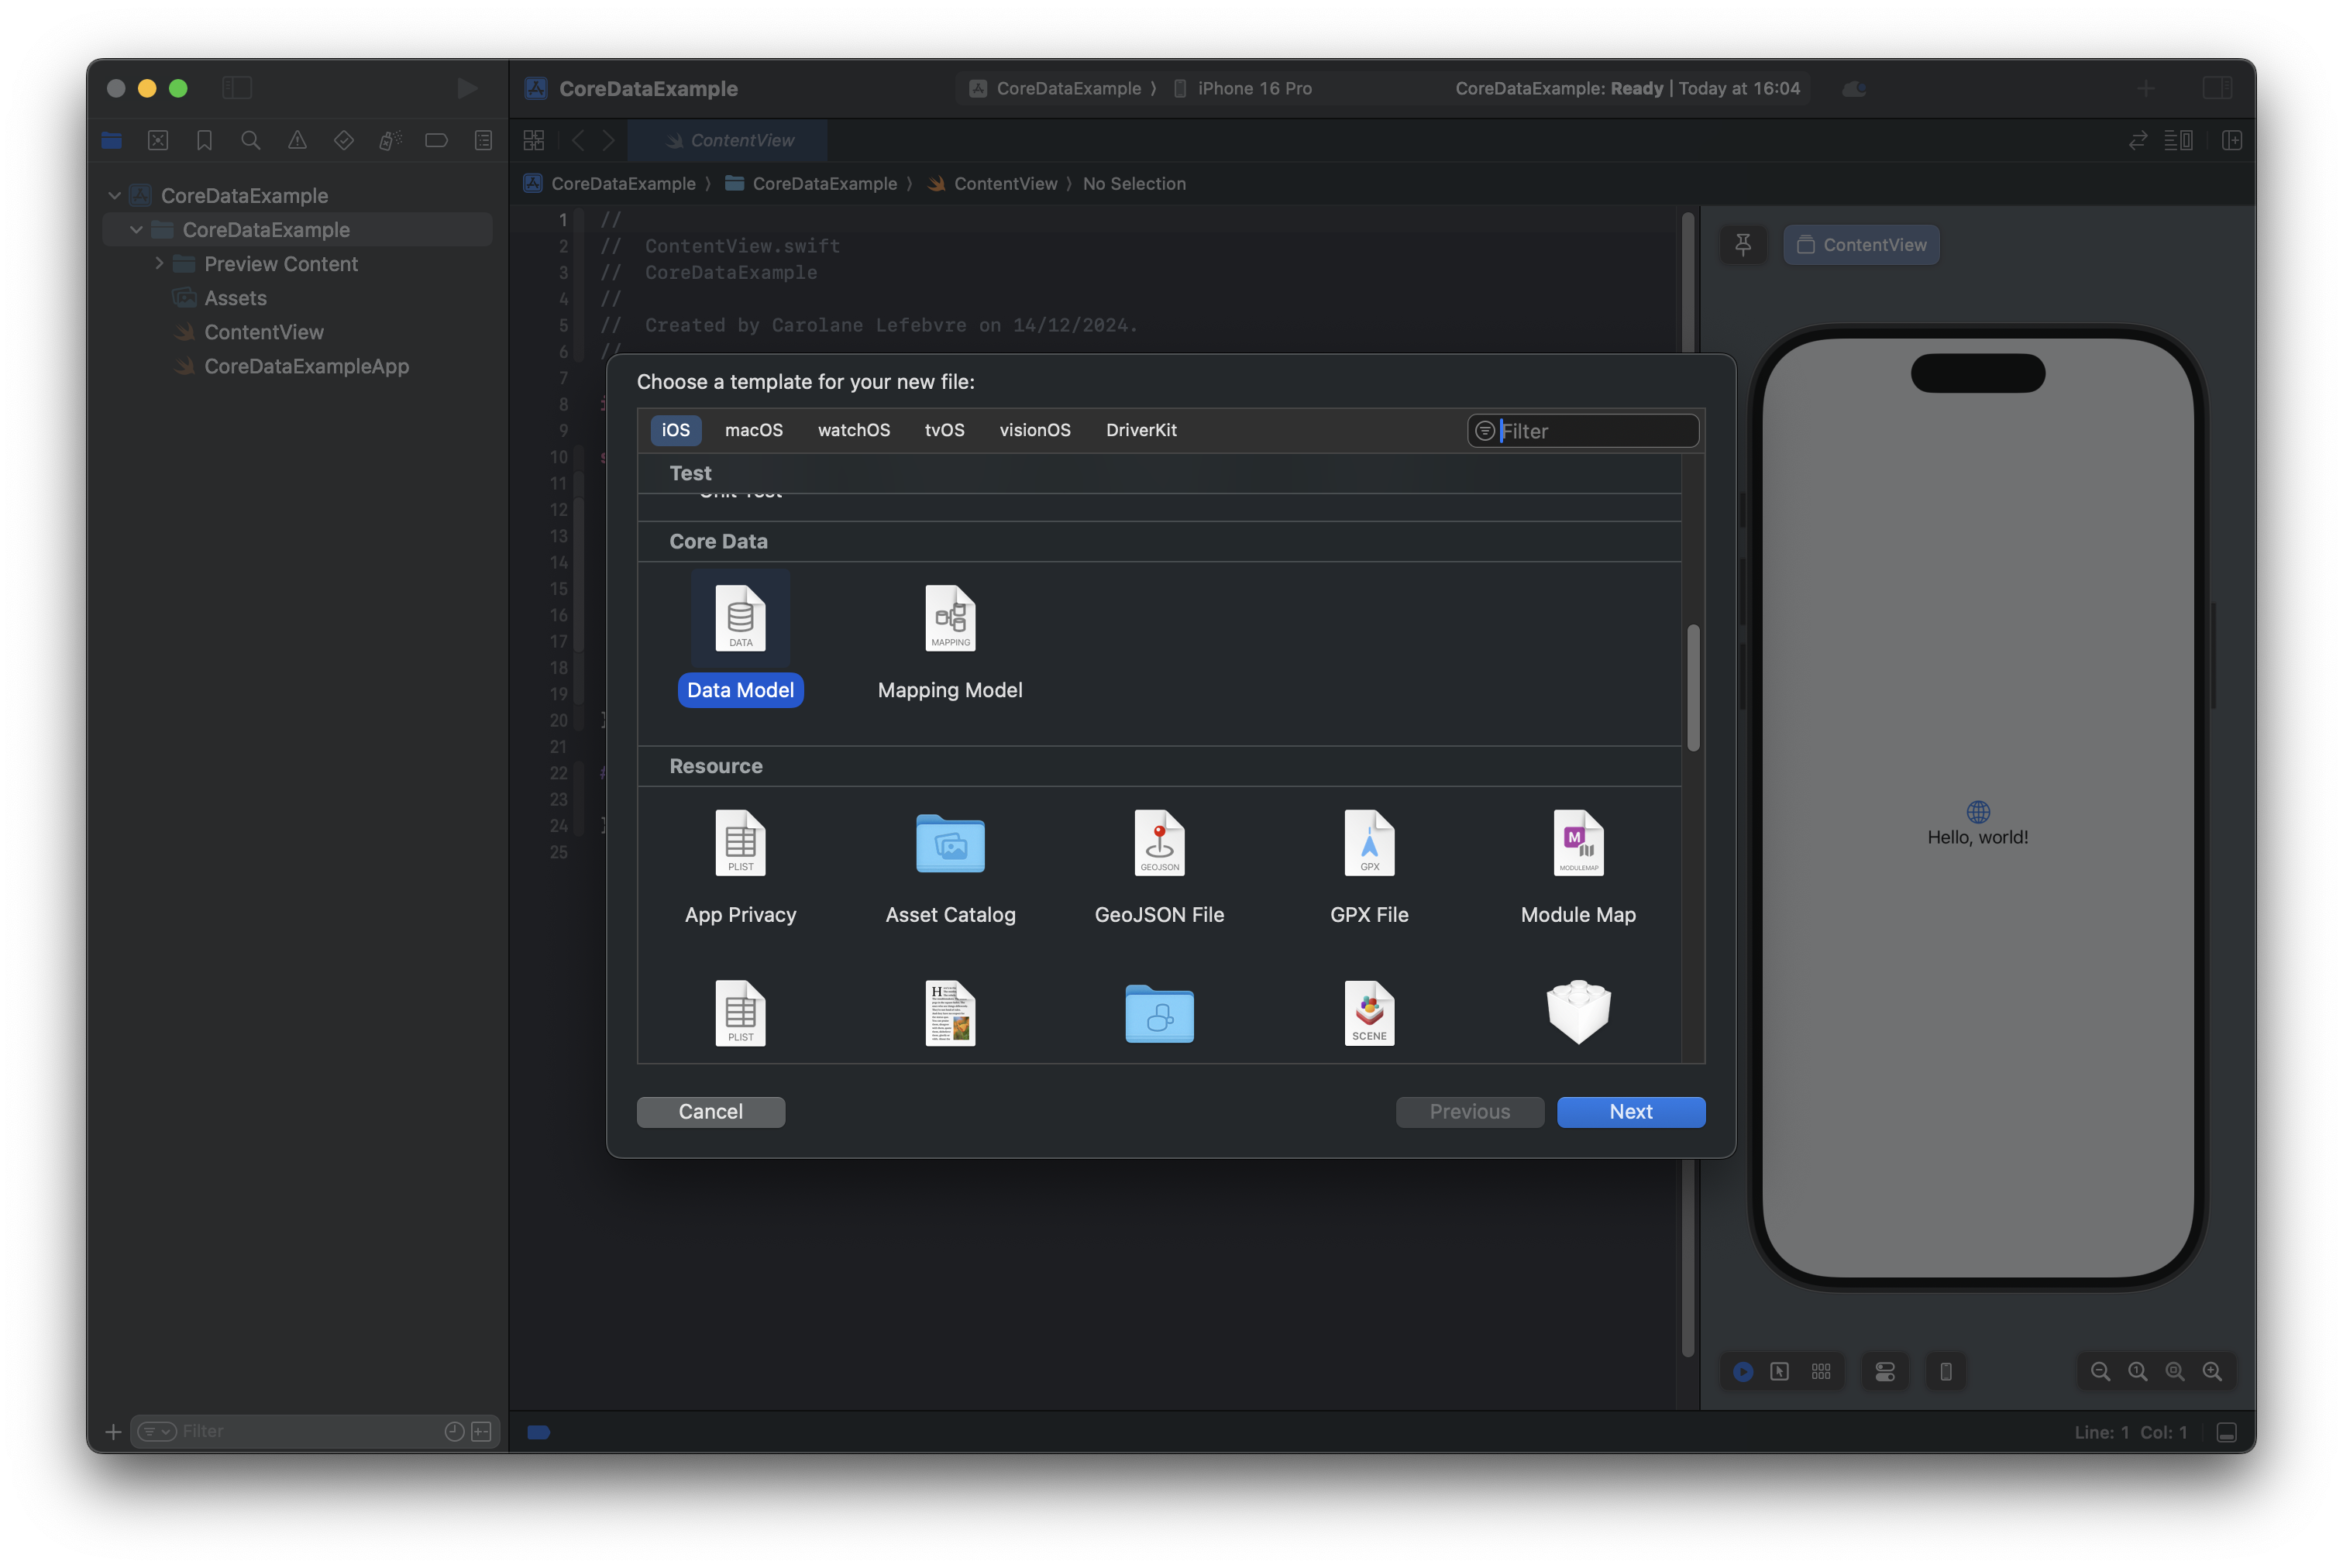
Then, you can name your Data Model. I named mine CoreDataExample, like the app. It is not mandatory for the Data Model name to match the project name, but it is a common convention and can help avoid confusion. After naming it, it will create your .xcdatamodeld file. And voilà!
WARNING
When creating your .xcdatamodeld file, choose the name carefully and avoid spaces or special characters.
- The name of this file must match the name you provide when initializing the
NSPersistentContainer. - A mismatch between the file name and the container name will cause your app to crash at runtime.
Setting up the Core Data stack
The Core Data Editor
When created, you end up in the Core Data Editor:
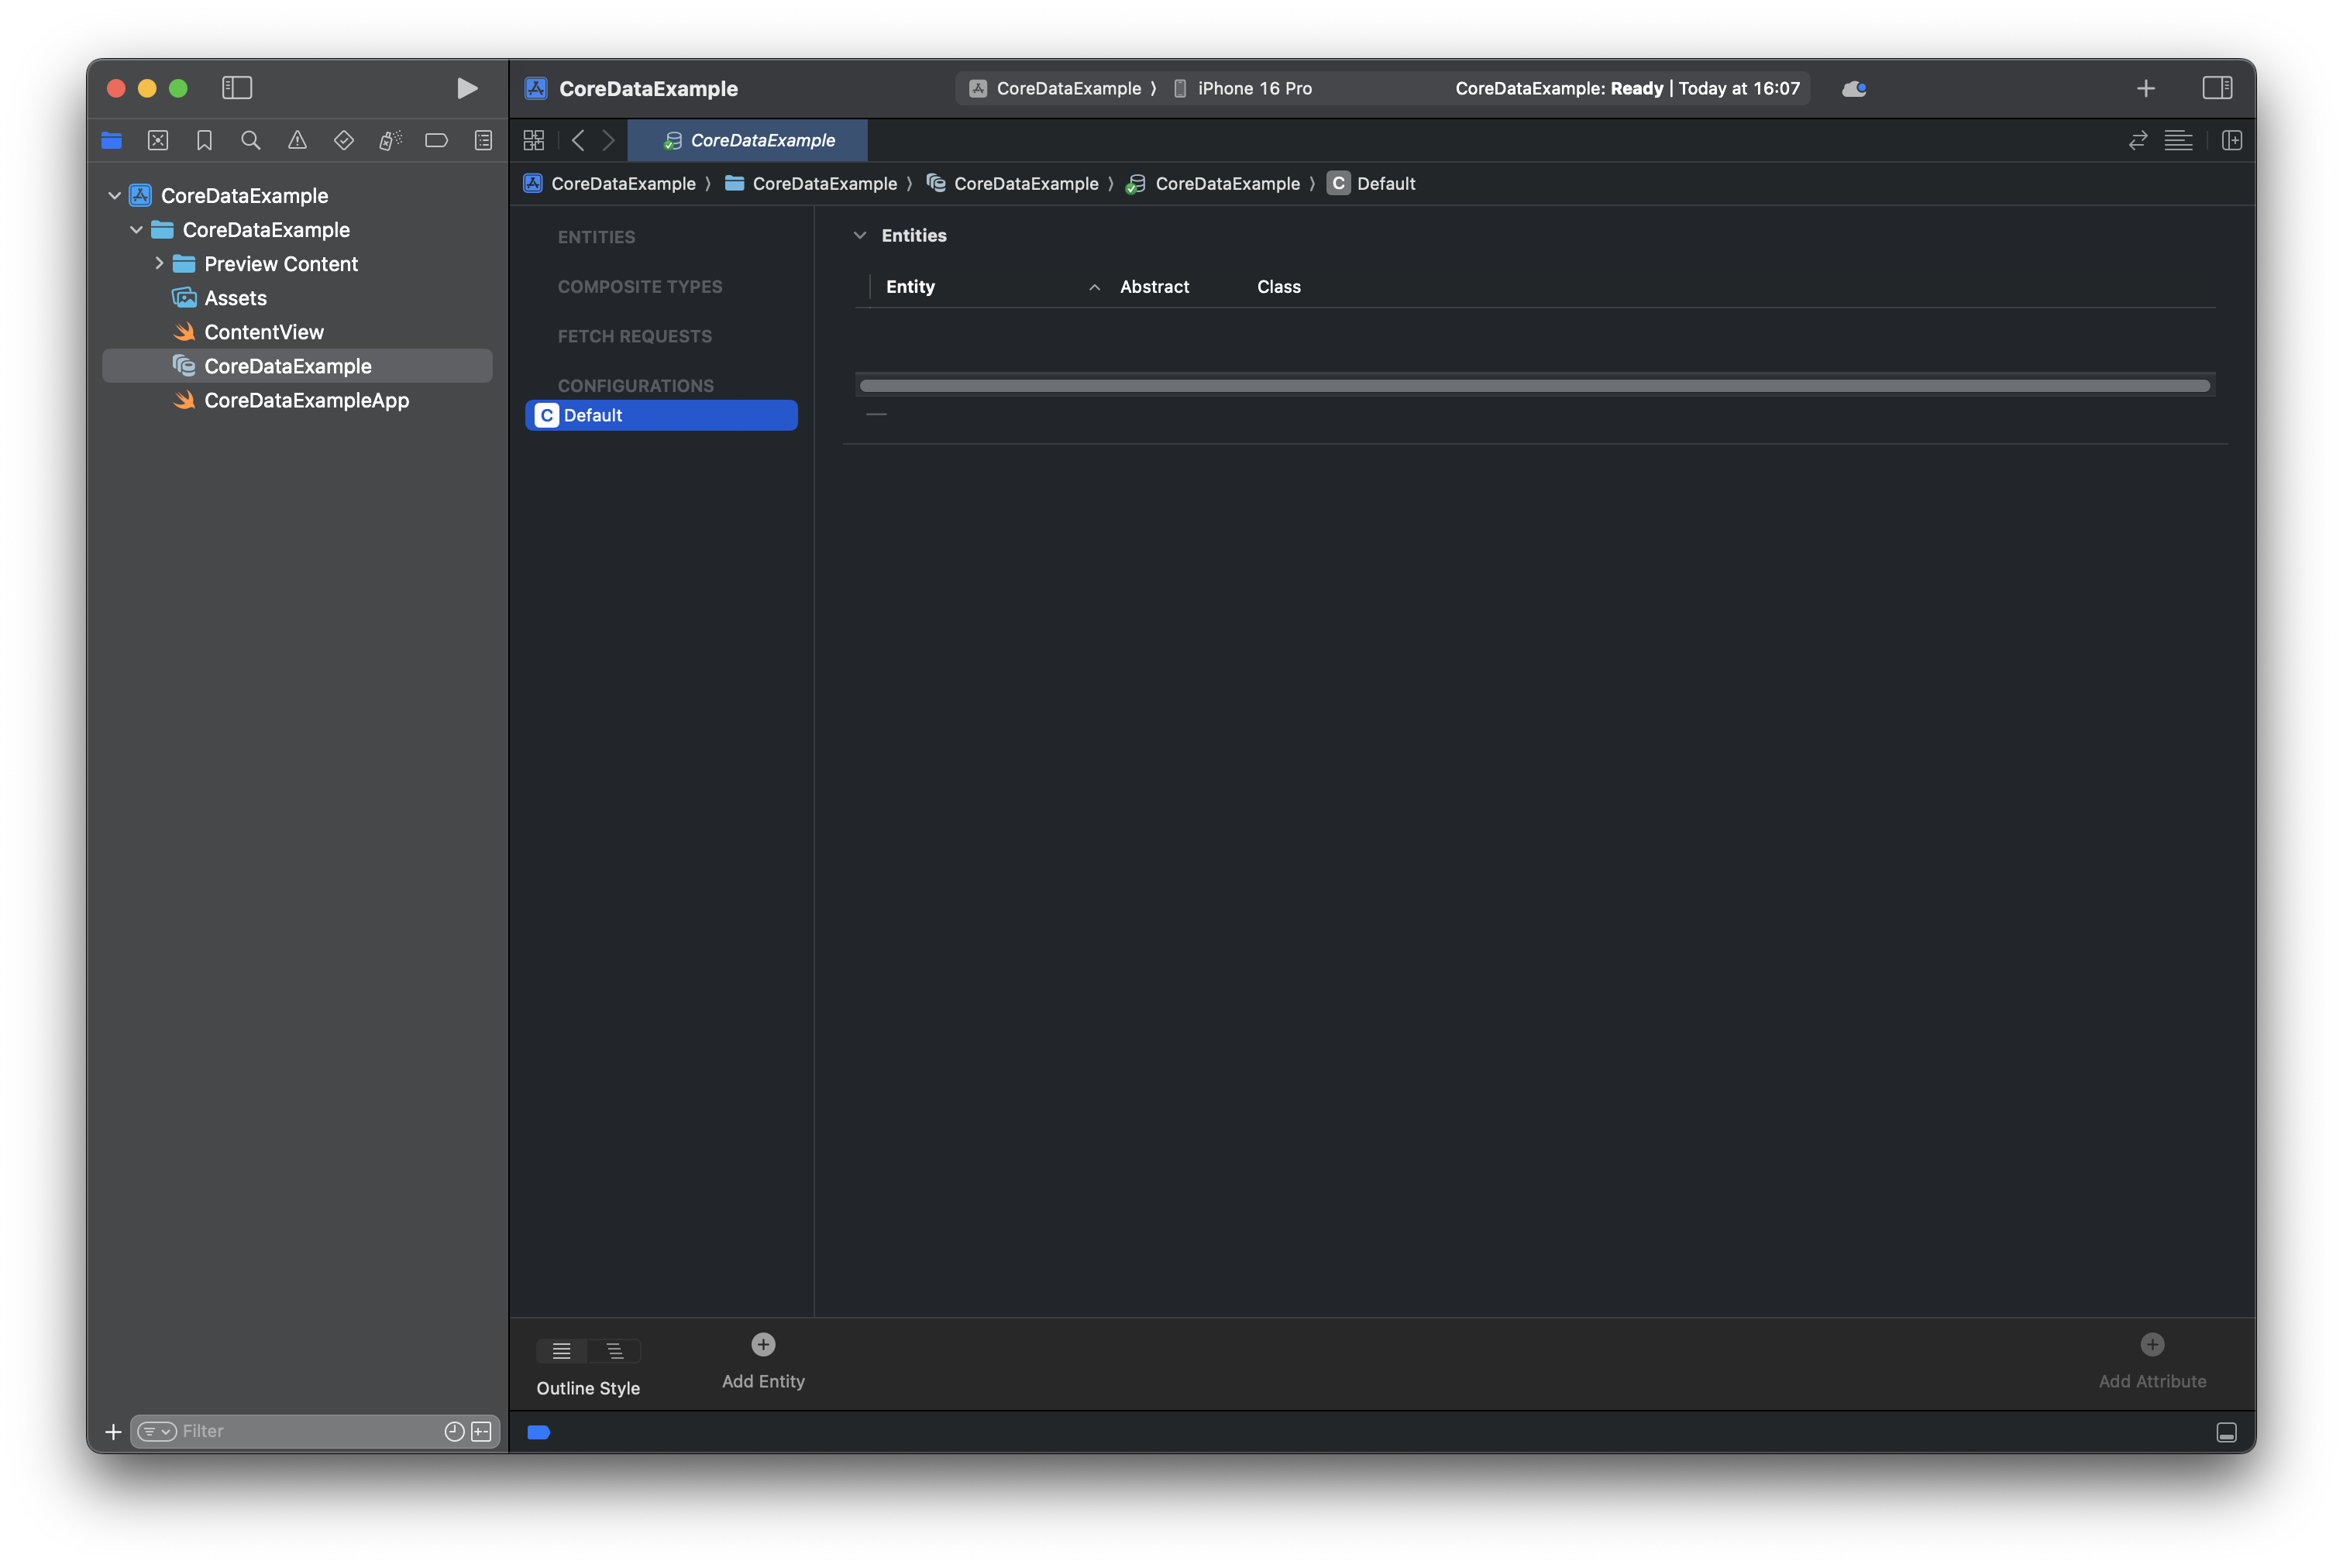
Here’s what you’re looking at:
- Entities: These are your data models. For example, a ‘Todo’ entity might have attributes like ‘title’ and ‘isDone’.
- Attributes: Define the properties of your entities, like Strings, Booleans, or Dates.
- Relationships: Connect entities to represent relationships, like 'Categories' containing multiple 'Todos'
Entities and Attributes
Great! Now let’s add our first Entity. Click on the Add Entity button (at the bottom of the Editor) and name it Todo. You can now click on Todo, and start to add attributes:
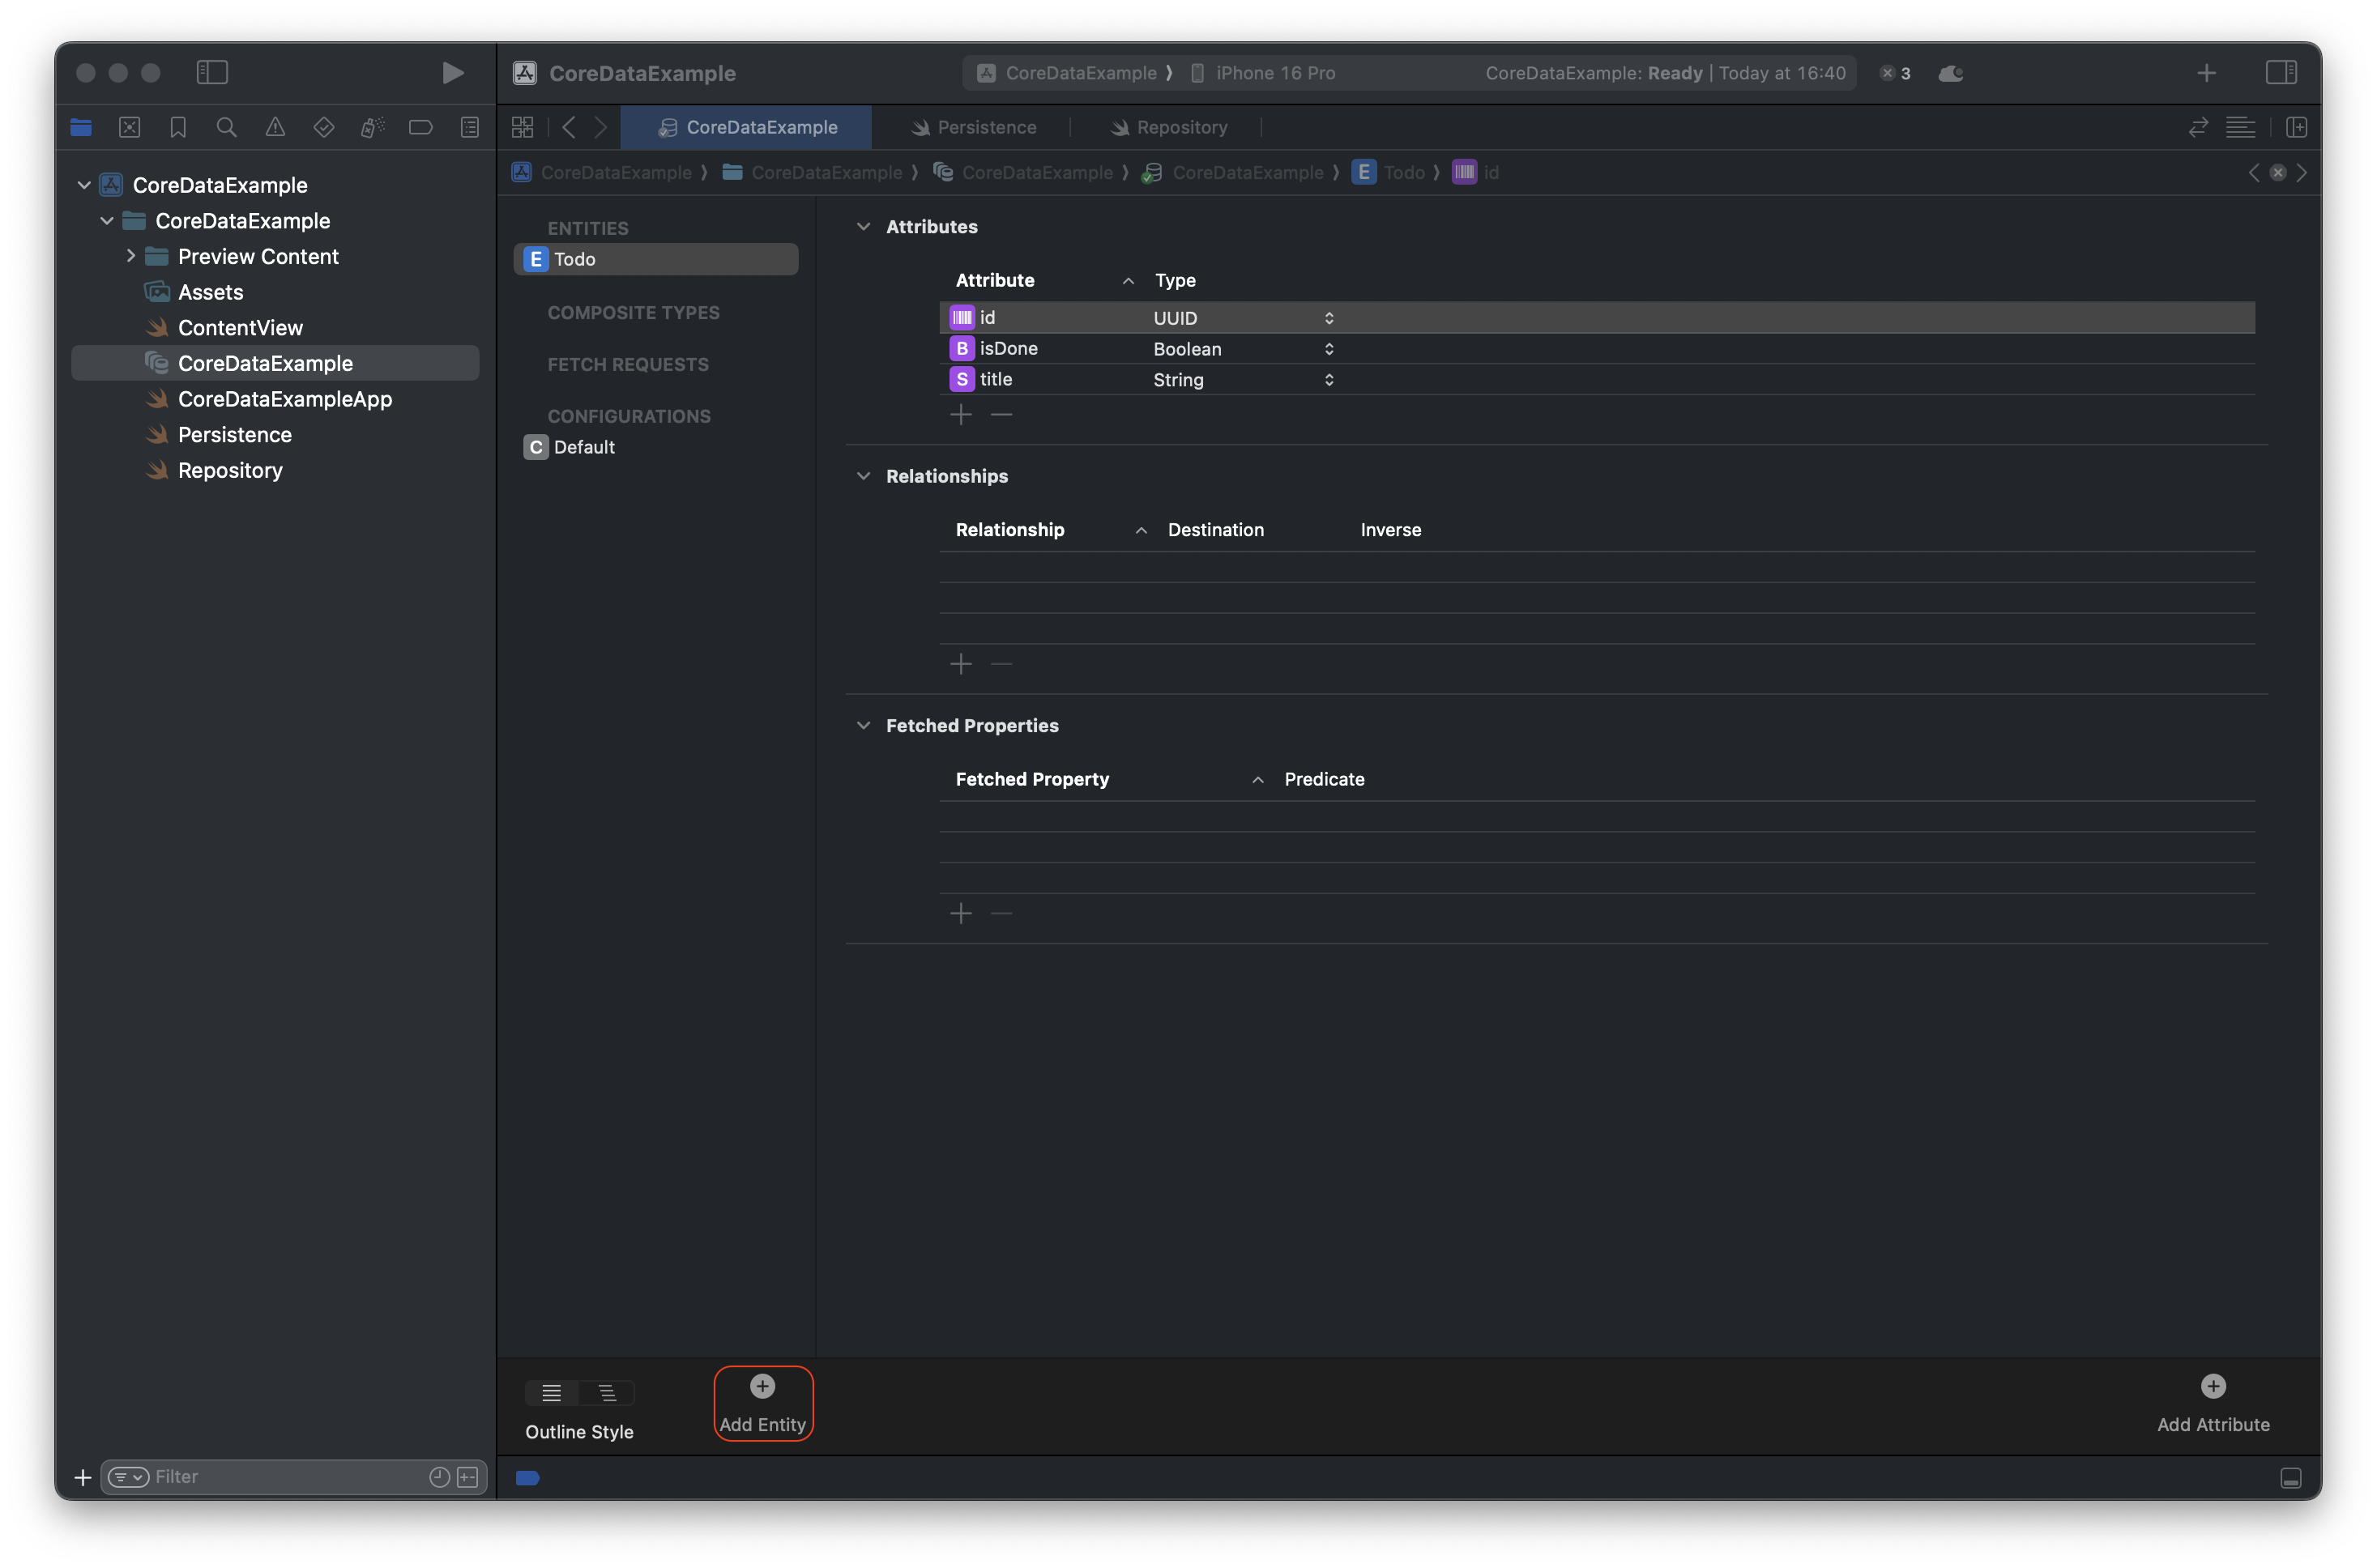
Here, we gave it 3 different attributes:
- An
idof typeUUIDwhich is going to be the id of each todo created. It is used for unique IDs to ensure no twoTodoobjects have the same identifier. - An
isDoneattribute of typeBooleanwhich is used to track completed tasks. - And a
titleattribute of typeStringwhich is perfect for storing text like the todo's title.
INFO
For now, we are only going to focus on Entities and Attributes. We will see relationships on another article.
Be careful tho! Each attribute you create is going to be optional by default. You can choose if your attribute must be optional or not. To do so, you can click on an attribute you've created, and open the Navigator on the left of Xcode. You see a new window appearing, with different informations.
You get the name of your attribute, its type, and different options. You can uncheck or not the Optional option, and that's what I did:
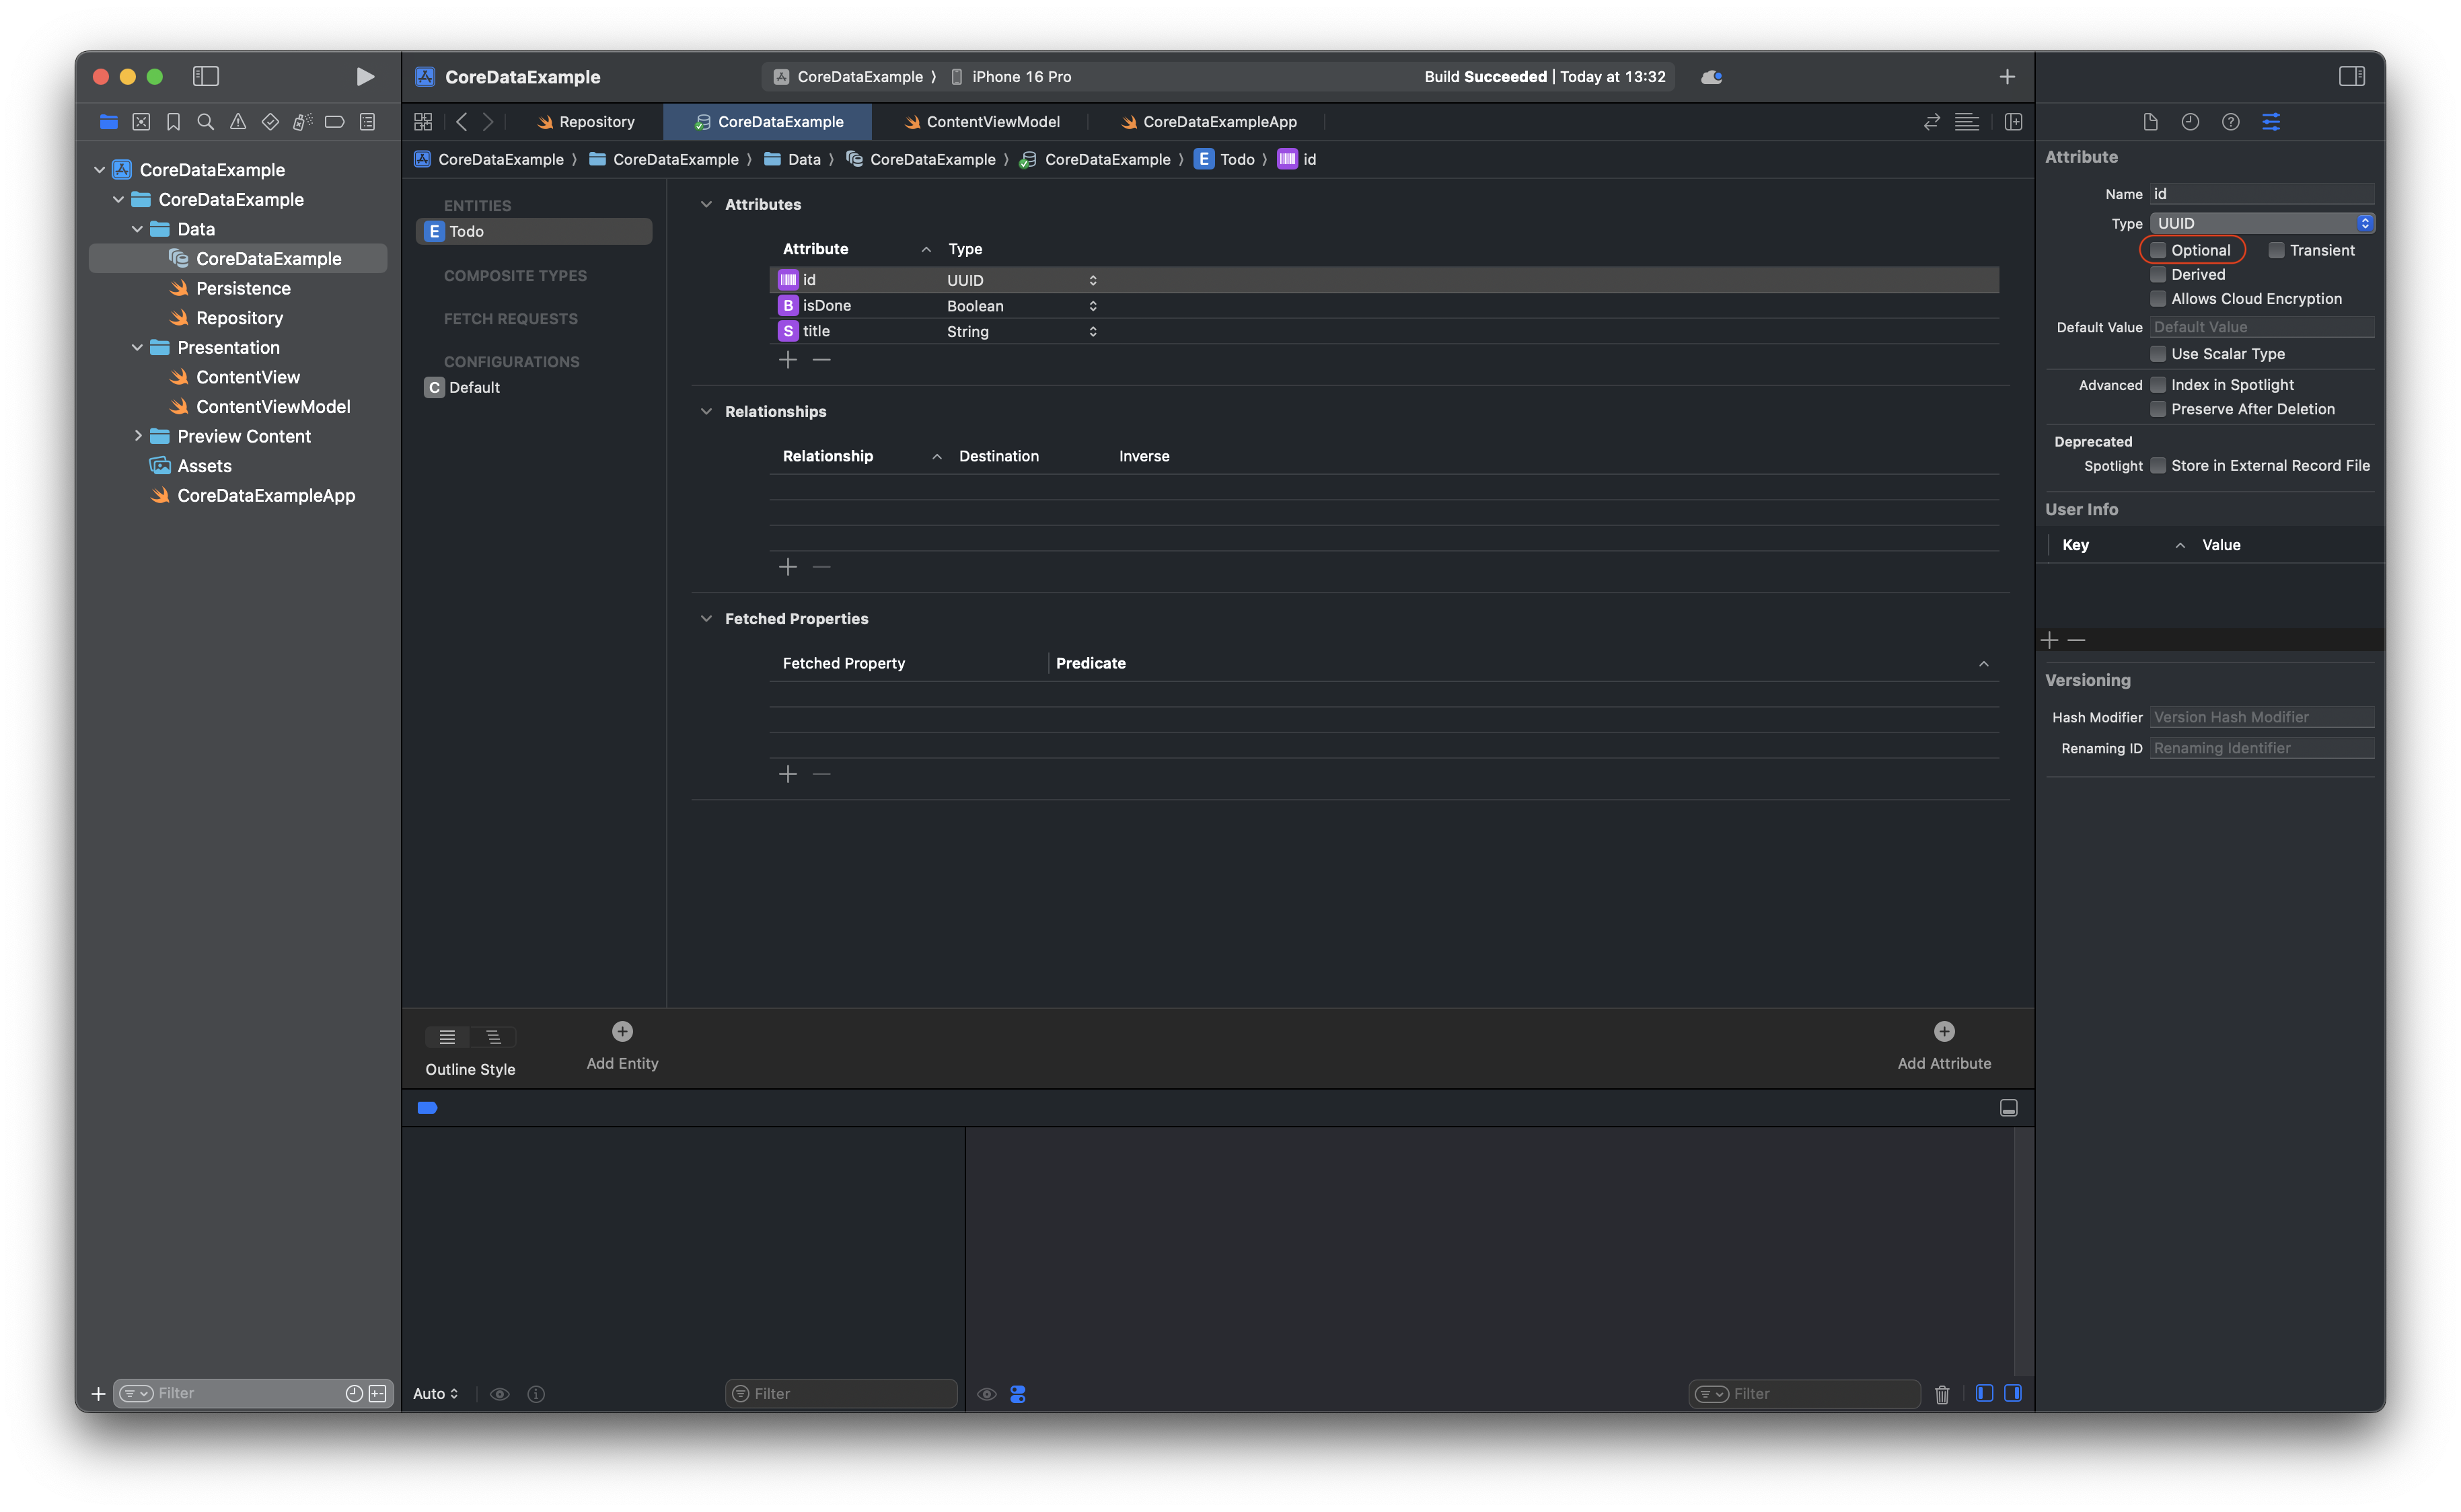
Why? In this project, we are always going to create a todo with these 3 attributes. However in some projects, you might need optionals, whether it’s a title or a number. So don’t forget to wrap and unwrap your optionals in your code when needed.
At this point, we’ve set up our first Core Data entity, Todo, with three attributes: id (a unique identifier), isDone (a Boolean to track completion), and title (the task name). Next, we’ll look at how these attributes behave in the Core Data stack.
Persistence.swift
When you create a new project in Xcode with Core Data enabled, Xcode automatically generates a Persistence.swift file for you. Its main purpose is to configure and manage the Core Data stack, ensuring your app can interact with Core Data seamlessly. However, since we didn't tell Xcode to enable it, we need to do it ourselves! No worries tho, I am here to guide you step by step on how to do it.
The Core Data Stack Components
Little reminder from the previous article! The Persistence.swift file typically sets up the Core Data Stack:
NSPersistentContainer: Manages the Core Data stack and connects to the persistent store (e.g., SQLite database).NSManagedObjectContext: Provides a workspace where you create, fetch, update, and delete data.Persistent Store: The actual file or database where data is saved.
How Does the Persistence File Work?
Look at this code:
swift
import CoreData

struct PersistenceController {
		// A shared instance of the DataController
    static let shared = PersistenceController()

		// The Core Data container that sets up the stack
    let container: NSPersistentContainer

    // Initializes the container and loads the peristent store
    init(inMemory: Bool = false) {
        container = NSPersistentContainer(name: "CoreDataExample")

        if inMemory {
		        // Use an in-memory store, typically for testing
            container.persistentStoreDescriptions.first!.url = URL(fileURLWithPath: "/dev/null")
        }

        container.loadPersistentStores(completionHandler: { (description, error) in
            if let error = error {
                fatalError("Failed to load Core Data stack: \(error)")
                // Handle error, e.g., show an alert or retry mechanism
            }
        })
    }

    // Access the main view context
    var viewContext: NSManagedObjectContext {
        return container.viewContext
    }
}
Here’s what it does under the hood:
- The
NSPersistentContaineris responsible for loading and managing the Core Data stack. It ties together the data model (.xcdatamodeldfile), and the persistent store (e.g., SQLite, binary, or in-memory). - If
inMemoryis set totrue, Core Data uses an in-memory store instead of saving data to disk. This is particularly useful for unit testing or SwiftUI previews because it keeps the database temporary (data will not persist between app launches), which makes testing faster. - The
loadPersistentStoresline tells theNSPersistentContainerto load its persistent stores. ThecompletionHandlerchecks for errors during the loading process.
TIP
For production apps, consider to handle error instead of fatalError, since it's going to make your app crash.
- The
viewContextis the main thread context of the Core Data stack. It’s made easily accessible via theviewContextproperty so that you can inject it into your SwiftUI views.
To summarize: The Persistence.swift file sets up the Core Data stack using the NSPersistentContainer. It initializes the persistent store, configures an in-memory store for testing, and provides a viewContext for interacting with data on the main thread. This makes it easy to save, fetch, and manage your app’s data.
Now that you understand the Persistence.swift file and how it sets up the Core Data stack, we’re ready to start working with data! In the next article, we are going to create, fetch, update, and delete data using Core Data in a SwiftUI app.
